
Integration & Monetization
As a publisher, you integrate your website or app's ad slots into ADBNK at pub.adbnk.co and earn revenue by showing ads. The whole process has four steps: add a site → create a zone → grab the embed code → track revenue.
Flow overview
Step 1: Add a site
A site is one of your websites or apps. When creating one, submit:
| Field | Description |
|---|---|
| Site name | Required |
| Domain | Required for the web type; must be a valid, unclaimed domain |
| Type | WEB (website) or App and other media types |
| Category | The site's industry, to help match ads |

Pick the media type first (website / mobile app / mini program) — a site belongs to exactly one platform type — then fill in the name, domain and category.
After submission the site enters PENDING review. The web type automatically registers your domain (including *.domain wildcards) for origin validation during serving.
A site must be approved before opening zones
Only APPROVED sites can create and submit zones. Make sure you own the domain and the content is compliant.
Step 2: Create a zone
A zone is a specific ad slot on a site's page. When creating one, set:
| Setting | Description |
|---|---|
| Zone name | Required |
| Parent site | Required; must be an approved site |
| Ad zone type | The format served in this slot (Banner / Native / Video / Push / Popup, etc.), see Ad Formats |
| Zone size | The zone's width and height (e.g. 300×250). Only asked for types that need a fixed size — fullscreen, video and push types size themselves |
| Platform | Serving device: All (PC + Mobile) / PC / Mobile |
| Placement | Where the zone sits on the page (Header / Sidebar / In-content / Footer / Float / Popup / Interstitial / Couplet) |
| Floor Price (eCPM) | Minimum revenue per 1,000 impressions, in $. Ads below the floor are not served; enter 0 for no floor |
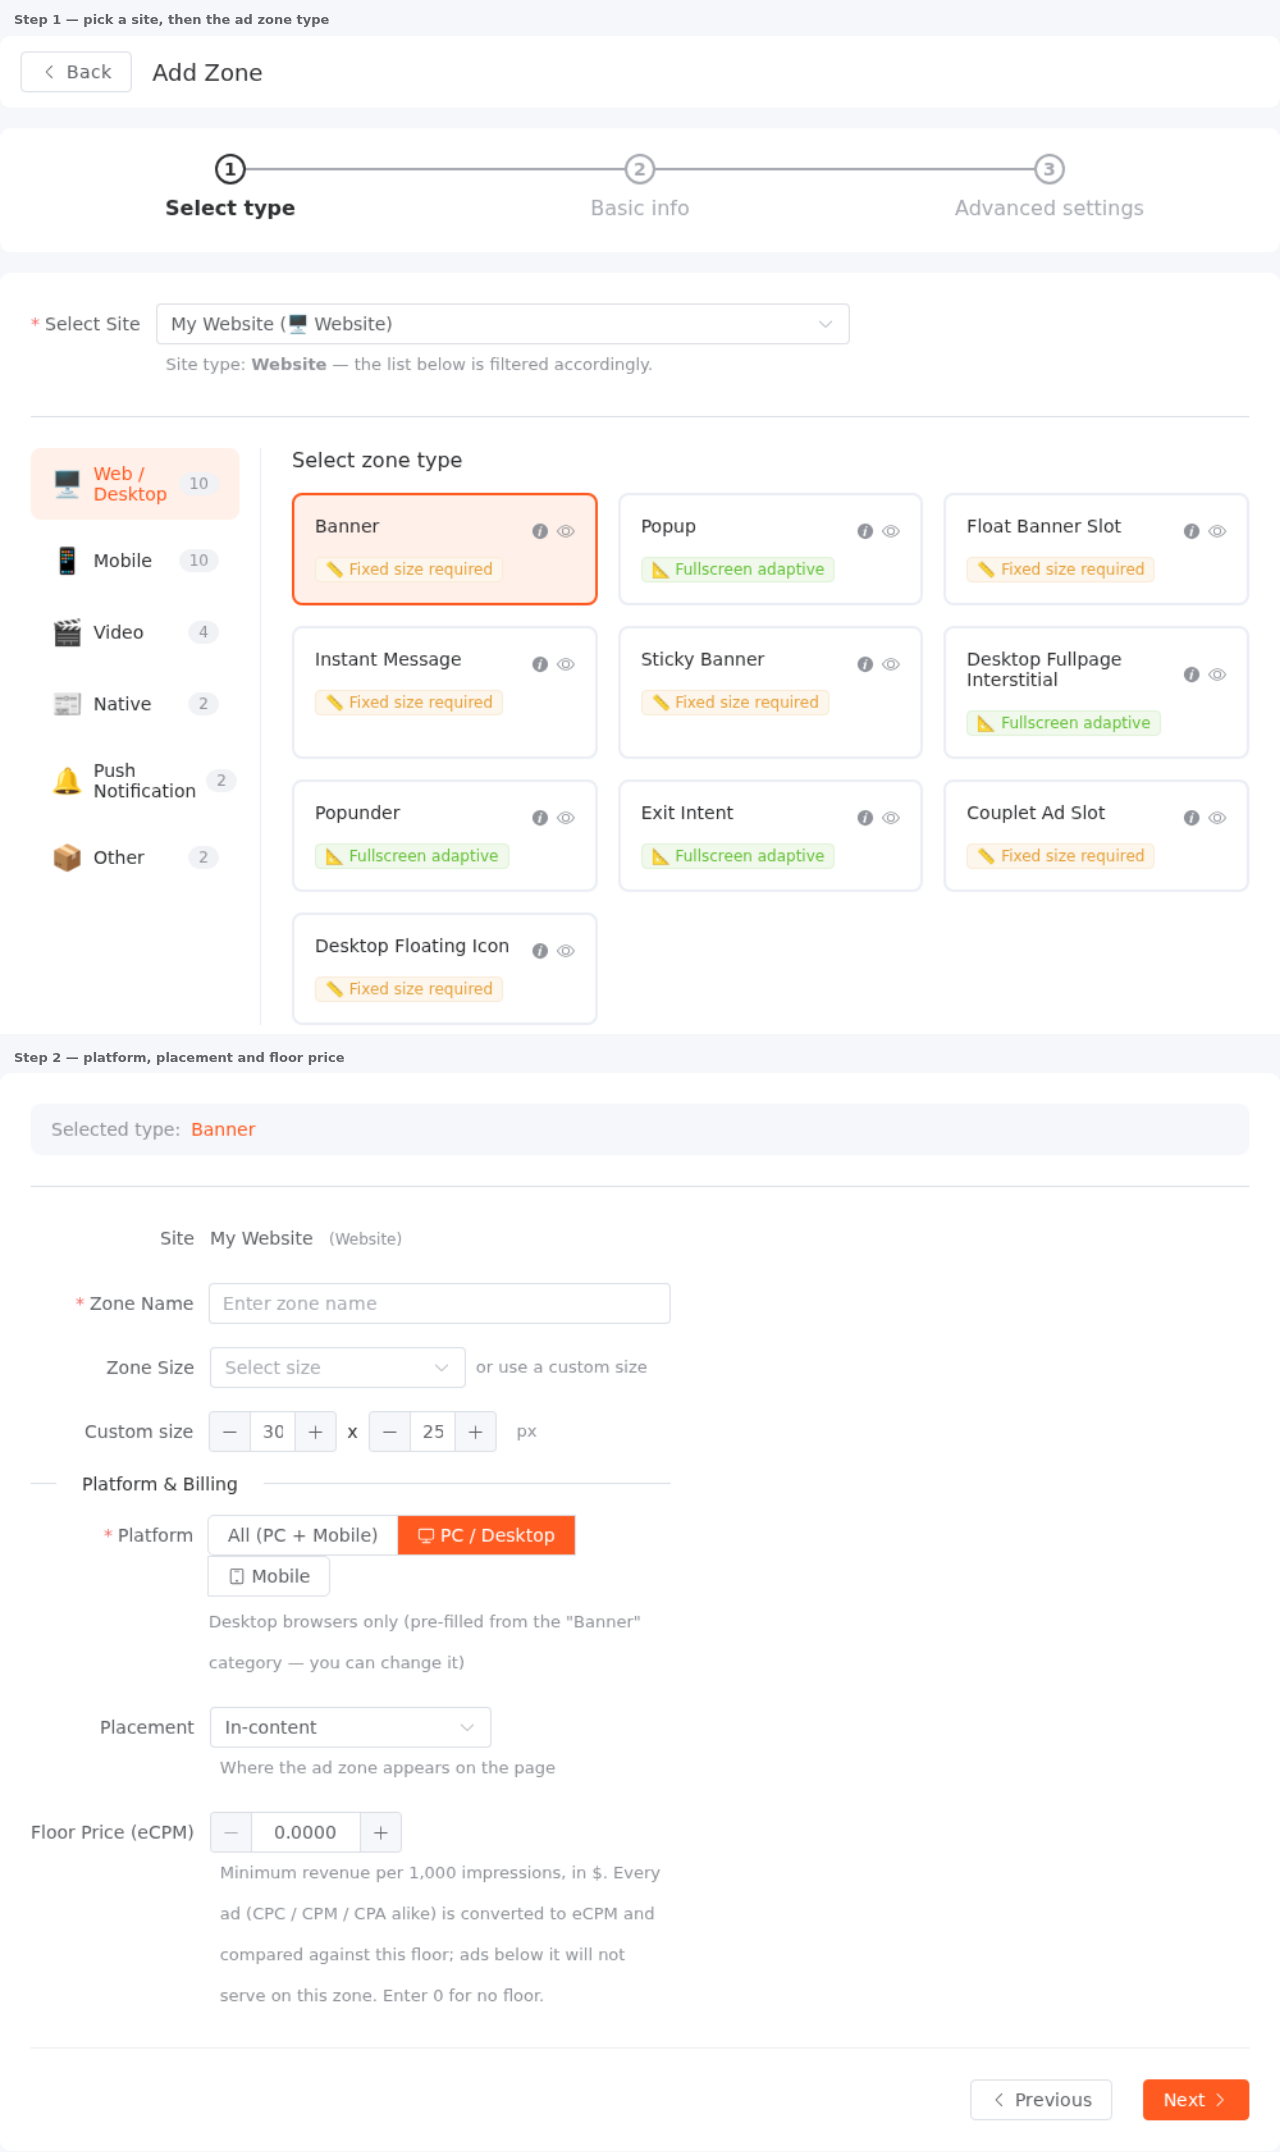
You can also configure advanced options: refresh interval, fallback content (fallback HTML/image/redirect shown when there's no ad), lazy loading, close button and delay, and more.
Each zone automatically gets a unique zone_key, the identifier used to grab embed code and serve ads.
One floor price, in eCPM
You don't pick a billing model — advertisers do (CPC / CPM / CPA / CPV). Every bid is converted to eCPM (expected revenue per 1,000 impressions) before the auction, so a single eCPM floor is all you need. Setting a reasonable floor filters out ads that bid too low and protects the revenue quality of your traffic.
Step 3: Get the embed code
Once the zone is approved, you can get three kinds of embed code. Pick one and paste it into the right spot on your page:
| Method | Traits |
|---|---|
| JavaScript (recommended) | Loads asynchronously, non-blocking, supports auto-fit |
| Async Loader | Good for multiple zones on one page |
| iFrame | Best compatibility, but no auto-fit |
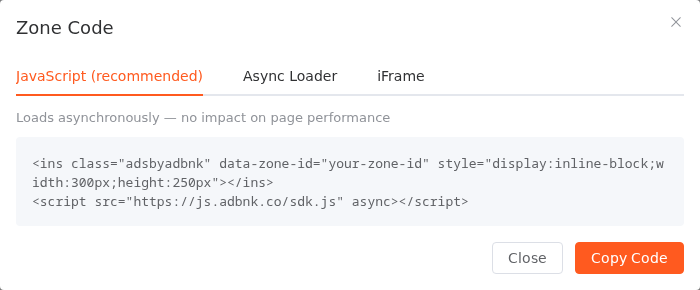
JavaScript example (data-zone-id is your zone_key):
<ins class="adsbyadbnk" data-zone-id="your-zone-id"
     style="display:inline-block;width:300px;height:250px"></ins>
<script src="https://js.adbnk.co/sdk.js" async></script>
iFrame example:
<iframe src="https://ad.adbnk.co/ad/render/your-zone-id"
        width="300" height="250" frameborder="0" scrolling="no"></iframe>
Unapproved zones can't get code
A zone must be APPROVED to get embed code, preventing unreviewed slots from going live early. For more JS integration usage, see SDK Docs.
Step 4: Track revenue and withdraw
Once the code is live, ads start showing and revenue accrues:
- The console lets you view impressions, clicks, CTR, and revenue by site/zone (a near real-time estimate refreshed roughly every 5 minutes).
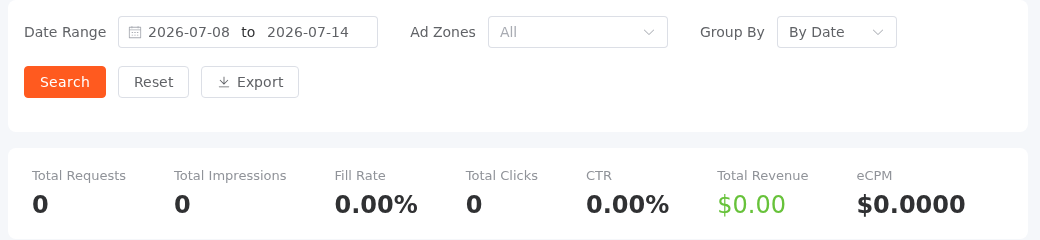
Statistics reports requests, impressions, fill rate, clicks, CTR, revenue and eCPM for a date range, grouped by date or by zone, and can be exported.
- The platform settles hourly at a revenue-share ratio (70% to the publisher by default). Revenue first enters "pending" and becomes withdrawable once the hold period ends.
- Once you meet the minimum withdrawal amount, you can request a payout.
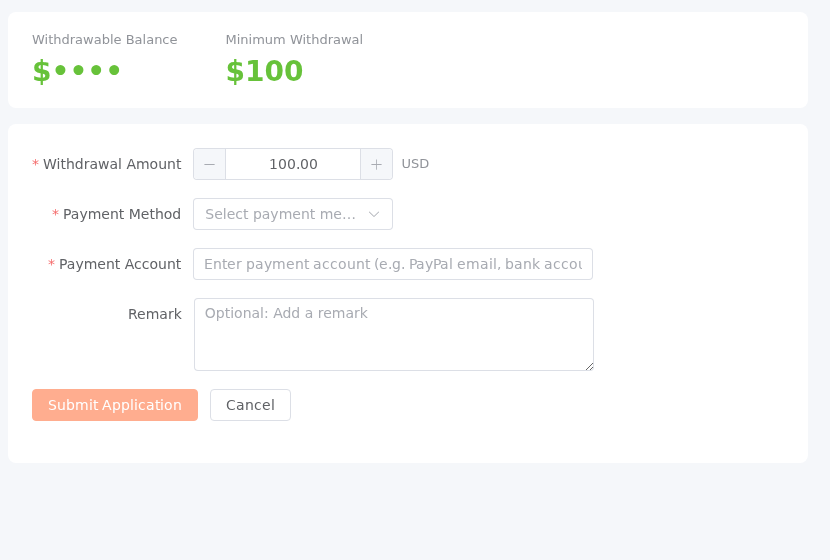
Finance → Withdraw shows your withdrawable balance and the minimum payout amount; pick a payment method, fill in the receiving account, and submit the request.
Settlement rules, revenue share, hold period, and payout methods are detailed in Settlement & Payouts. To earn extra rewards via invitations, see Referral Program.
Zone review status
| Status | Meaning |
|---|---|
DRAFT / not submitted | Created but not submitted for review |
PENDING | Submitted, awaiting admin |
APPROVED | Can get code and go live; can toggle enabled/paused |
REJECTED | Not approved, with a reason; resubmit after fixing |