
Create a Campaign
This page walks you through a campaign end to end: create campaign → create ad → add creatives → target → submit for review → go live. Everything is done at adv.adbnk.co.
Flow overview
Step 1: Create a campaign
The campaign is the top-level serving unit. When creating one, set:
| Setting | Description |
|---|---|
| Campaign name | An easily recognizable name |
| Ad format | The format to serve (Banner / Native / Video / Push / Popup / Rich Media / Responsive, etc.), see Ad Formats |
| Pricing model | CPC / CPM / CPA / CPS / CPV |
| Bid | The price you're willing to pay per click/impression/conversion |
| Daily / total budget | Spend caps; fill in at least one |
| Serving dates | Start/end dates; leave empty for unlimited (always on) |
| Targeting | Region, device, OS, browser, daypart, etc. |
| Rotation mode | EVEN (even rotation) or OPTIMIZE (optimize for performance) |
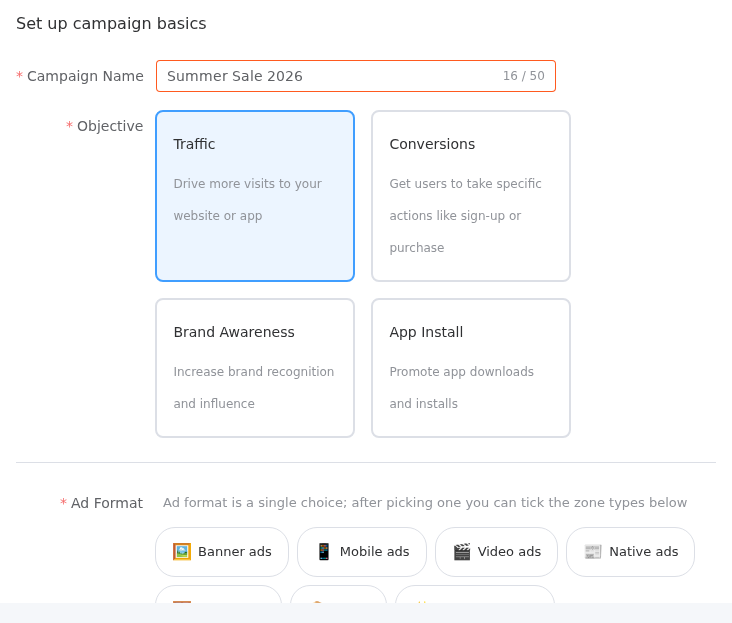
Creating a campaign is a five-step wizard: Basic Settings → Audience → Tracking → Schedule & Budget → Ads. Step 1 covers the campaign name, the objective, and the ad format:
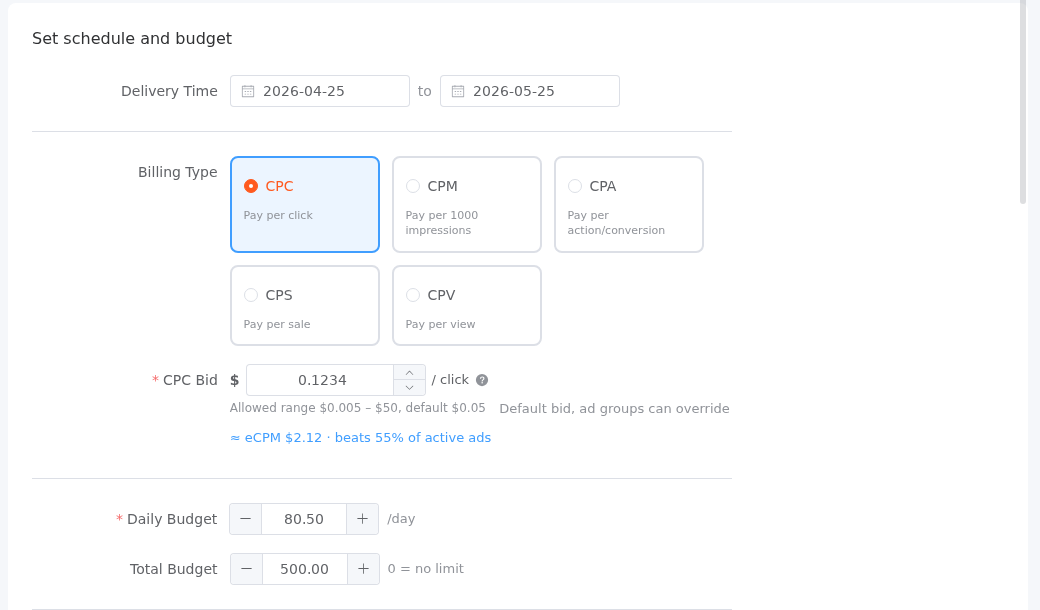
The pricing model and the money live in Step 4 (Schedule & Budget). Pick one of the five billing types, set the bid, and cap your spend with a daily and/or total budget — the panel also previews the eCPM your bid translates into:
CPA / CPS require a tracker
If you choose CPA or CPS pricing, you must first bind a conversion tracker to the campaign, otherwise saving is rejected. See Conversion Tracking.
Bids and budgets cannot be negative
Bid, daily budget, and total budget must all be non-negative. A newly created campaign starts in DRAFT status — it does not serve immediately and has not yet entered review.
Step 2: Create an ad
Create a specific ad unit under the campaign. Each ad can have its own landing page and copy:
| Field | Description |
|---|---|
| Ad name | Required |
| Parent campaign | Required; an ad must belong to a campaign |
| Landing page URL | The destination the click redirects to |
| Display URL | The branded URL shown to users (optional) |
| Deeplink | Optional for app scenarios |
| Headline / Description / Button text | Used by native, responsive, and similar formats |
| Brand name | Optional |
| Pricing model / Bid | Falls back to the parent campaign when empty |
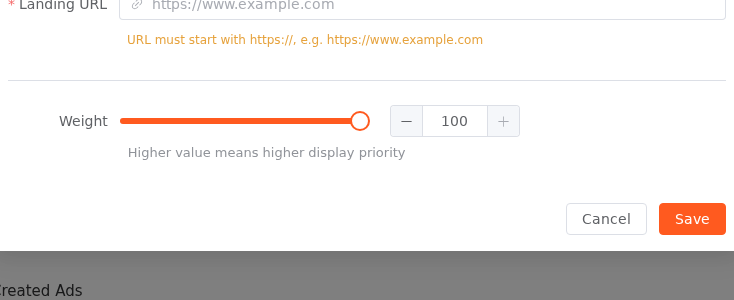
Ads are created in Step 5 (Ads) of the wizard, via Create Ad. In the dialog you choose the creative source (a standard creative that matches the zone size, or a responsive ad), name the ad, set the landing URL, and attach creatives:
A newly created ad defaults to PENDING review status.
Step 3: Upload or select creatives
A creative is a pure media asset, decoupled from the ad and reusable across multiple ads:
- Three types — image / video / HTML. Pick an existing one from the library, or upload a new one.
- One ad can attach multiple creatives for rotation; the same creative can also be referenced by multiple ads.
- To auto-fit one creative set to every size and switch copy language by visitor region, use responsive ads — configure headlines, descriptions, images, logos, and videos once, and the system composes ads at various sizes automatically.
Creatives are uploaded via the media library
Advertisers upload creatives through the Media Asset library; ads and responsive ads reference them by asset ID for centralized management and reuse.
Step 4: Configure targeting and bidding
Set targeting at the campaign or ad-group level so ads reach only the right audience:
- Geo targeting: serve or exclude by country/region, down to postal code.
- Device / OS / browser: e.g. mobile only, Android only.
- Daypart & weekday: time-of-day scheduling (dayparting).
- Per-dimension bid adjustments: adjust bids by device / geo / OS in ±% (per item from −90% to +500%) to shift budget toward high-value traffic.
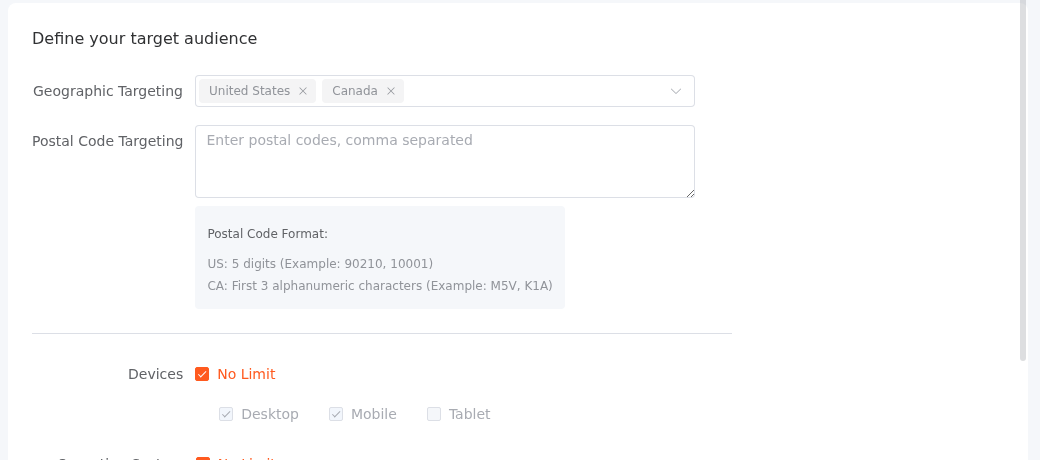
Targeting is Step 2 (Audience) of the wizard. Every dimension defaults to No Limit — leave it as is for maximum reach, or tick individual values to narrow delivery:
For the full explanation, see Targeting & Bidding.
Step 5: Submit for review
Once fully configured, submit the campaign for review. Before submission the system validates:
- Required fields are complete:
name,pricing_model, bid, budget (at least one of daily/total budget greater than 0). - The campaign has at least 1 ad attached.
- CPA / CPS has a tracker configured.
After submission, the campaign enters PENDING review, handled by an admin.
Review status reference
Campaigns, ads, and creatives each have their own review status:
| Status | Meaning | Next action |
|---|---|---|
DRAFT | Just created, not yet submitted | Complete content and submit for review |
PENDING | Submitted, awaiting admin | Wait for the result |
APPROVED | Ready to serve | Enable to go live |
REJECTED | Not approved, with a reason | Fix per the reason and resubmit |
Editing an approved campaign triggers re-review
Once an APPROVED campaign is edited, it automatically reverts to draft and pauses serving, and must be resubmitted for review before going live again — this prevents unreviewed changes from taking effect directly.
Step 6: Go live
After approval, a campaign's run state can toggle between RUNNING and PAUSED. An ad only truly enters the auction when the campaign, ad, and creative are all approved and enabled.
Once live, you can view performance data — impressions, clicks, CTR, spend — in the console (refreshed roughly every 5 minutes), while actual charges are settled hourly. See Settlement & Payouts for the billing definitions.

Statistics lets you pick a date range and a grouping, then breaks impressions, clicks, CTR and cost down day by day.